We offer private, customized training for 3 or more people at your site or online.
This tutorial will teach you how to add user authentication to a mobile app using Swift/iOS as our platform. The process on Android is similar (see this page for details on the Android process in place of the iOS portions in this tutorial - https://docs.aws.amazon.com/aws-mobile/latest/developerguide/add-aws-mobile-user-sign-in.html#set-up-email-and-password).
We will look closely at three main areas:
- Creating our Project/App presence in AWS
- Adding User Sign-in to an AWS App
- Using Xcode configuration and CocoaPods
Creating our Project/App presence in AWS
The first thing we will do is go to the AWS Mobile Hub and create a new project. You will first need to sign up for an AWS account (if you don't have one) by visiting https://aws.amazon.com.
Selecting the First Project Platform
Go to https://console.aws.amazon.com/mobilehub/ and in the "Step 1" box pick the platform (e.g., iOS). Then in the "Step 2" box, pick "Cloud enable your existing app" and click "Start."
Once you have at least one project, the UI will look a little different, but the functionality is the same.
TLDR:
The Tutorial route gives you options to use a template for various AWS-based apps. This is a great way to learn some of the other services or start a new project with the given functionality.

Name your Project
Next, you will create a new project by giving it a name. We will name ours MyAWSApp:

Now you've created your AWS Project and added the first platform/app.
The next screen will let you download the config file. We could do that now, but first, we will add more to the configuration of our app. The configuration file is a JSON file that has settings that allow your app to use AWS features.
Since we haven't enabled the AWS Authentication, we will need more info in our configuration file before we use it.
Click Next.

The next screen has a link to add the AWS Mobile SDK. You can follow those steps, but if you continue through this tutorial, we'll do that later (instead of jumping between AWS and Xcode over and over).
Click Done and you'll see the app listed in your project.
If we wanted to add another platform now, we could click the "Add new app" button. However, we're going to move forward with one platform for now.
Adding a User Sign-in to an AWS App
Under the "Add More Backend Features," you will see the "User Sign-in" box and a plus-sign (+) button under that. Click the + button to add this feature to your app.

Sign-in Settings
The "Email and Password" selection is the default. We'll focus on adding that to our app for this tutorial. The Facebook and Google routes are not difficult.
Select "Create a new user pool" unless you already have a Cognito user pool to import.
In the next section, select the options you want for the user's login. Username, email, phone, multi-factor authentication, and password requirements are specified here.
NOTE: Once these are set, they cannot be edited.
Here's how I configured this project:

At the bottom is a switch to require that users be signed in to access AWS resources. You may be creating an app to allow users to search in a database, and they don't need to be logged in unless they want to store values. In that case, you may not want to require they are logged in.
I'm going to switch the setting on (specifying that users have to be logged in to access the online features).
Once you are satisfied with the settings, click Create User Pool.
Once the pool is created the "User sign-in" screen is displayed again. Notice the blue banner at the top stating that the backend has been updated. It has a link to the integration page.

You can click that or the link to MyAWSApp at the top left. Either way, you will go back to the project and see the platform/app listing. The "Integrate" button should be glowing blue to show you that you need to download the new config file:

If we were going to add more backend features (like User File Storage) we could do so now. Since we are focusing on the User Sign-in, we will go ahead and follow the integration steps.
Xcode configuration and CocoaPods
First, download the Cloud Config File.
Click on the Integrate button and, on the next screen, click the "Download Cloud Config" button. This will download the awsconfiguration.json file.
Click Next. It will display more help for adding the backend features to your app's source code. You're welcome to view those, but the steps below will take you through what you need.
Click Done.
Creating your Xcode/iOS Application
Open Xcode and create a new project. I will name my MyiOSApp.

You will need a Navigation Controller so you can create a project based on the Master Detail Template. Or you can select the Single View Controller template and then embed the Storyboard's View Controller in a Navigation Controller.

Installing CocoaPods
Save your project and close Xcode.
Open a Terminal to the directory where your project is stored (i.e., where your <project name>.xcproject is located).
Install the CocoaPods gem if necessary (see https://cocoapods.org).
In that directory, run:
> pod init
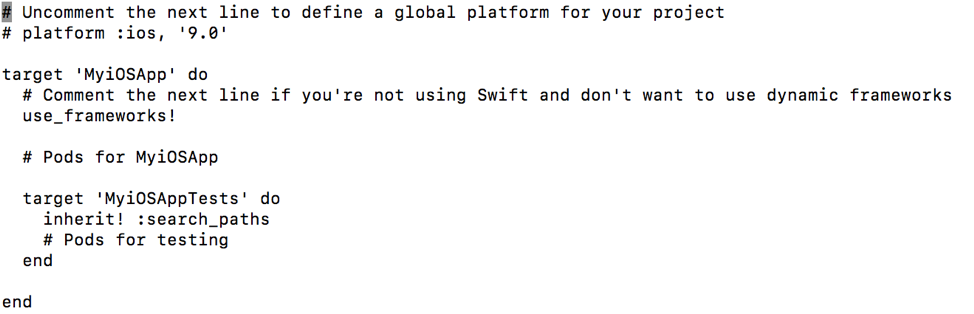
Notice it has "target 'MyiOSApp' do" to specify which target to add the upcoming CocoaPods to.
Now we will specify the CocoaPods we need. Under line 8 ("# Pods for MyiOSApp") add these lines:
pod 'AWSMobileClient'
pod 'AWSUserPoolsSignIn'
pod 'AWSAuthUI'
Now that we've specified our CocoaPods we need to install them. Back in the Terminal, run:
> pod install
This will fetch and install the CocoaPods we specified. It also creates an Xcode Workspace which will have 2 projects: One for your app and one for the Pods.
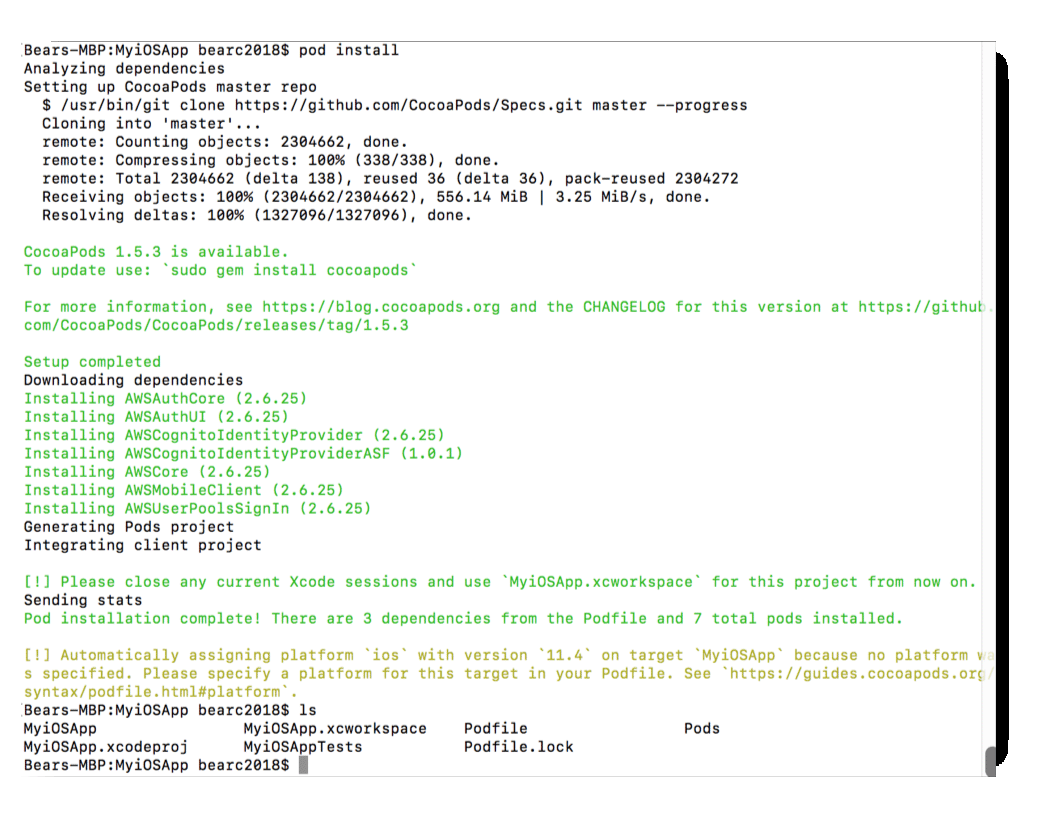
After the install finishes, doing a file listing ('ls') shows more files including a Pod directory where the CocoaPods are contained.
You'll also notice the MyiOSApp.xcworkspace. This is what you want to use from now on instead of the .xcproject. You can navigate to it via Xcode or run this in the Terminal:
> open MyiOSApp.xcworkspace
Now we can add the necessary code to our project…
Xcode Project Code
Open the Workspace (.wcworkspace) and notice the Pods project.
We need to configure the AWS client in the code. This will be done in the App Delegate callback for the launch of the app. Instead of just returning true, we'll return the result of the AWS client startup.
First, we need to import the CocoaPod at the top of the file:
import AWSMobileClient
In the didLaunchWithOptions function (first in the class), replace the 'return true' call with:
return AWSMobileClient.sharedInstance().interceptApplication(application,
        didFinishLaunchingWithOptions: launchOptions)
See lines 22-23 in the image below.
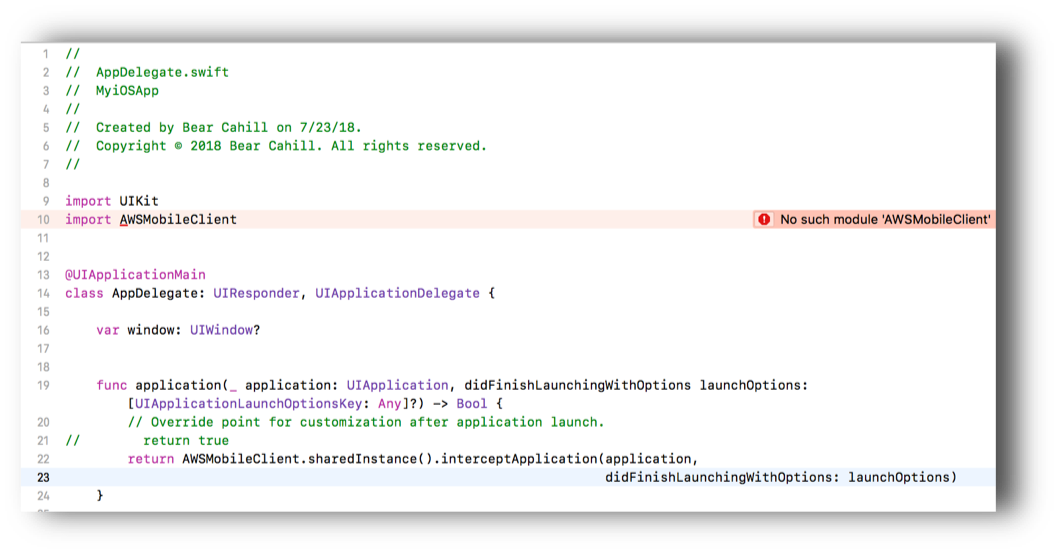
NOTE: You might get an error like in the image below until you build, which builds the Pods and fixes the error.
Xcode: Display the UI
We need to import some CocoaPods in our View Controller to handle sign-in functionality. In the ViewController.swift file, add these imports near the top:
import AWSAuthCore
import AWSAuthUI
Finally, we're ready to display the login UI. Wherever in your code you want to add it, you'll need to call .presentViewController on the AWSAuthUIViewController.
The call takes a few parameters including the navigation controller currently in use. This could be self.navigationController, though that returns an option that you will need to handle with unwrapping or optional binding.
The second parameter is a configuration. We won't cover that here but know that you can change things like color and other UI aspects via the configuration. See https://docs.aws.amazon.com/aws-mobile/latest/developerguide/add-aws-mobile-user-sign-in-customize.html
The third parameter is the completion handler for the authentication view controller.
  func showLogin() {
    AWSAuthUIViewController.presentViewController(with: self.navigationController!,
      configuration: nil) { (provider, error) in
        guard error == nil else { print (error?.localizedDescription); return }
          // user logged in
      }
    }
You can check to see if a user is logged in with the AWSSignInManager.sharedInstance() function call to .isLoggedIn.
You may want to show the login UI based on a button tap or automatically if .isLoggedIn returns false.
    override func viewDidAppear(_ animated: Bool) {
        super.viewDidAppear(animated)
        if !AWSSignInManager.sharedInstance().isLoggedIn {
            showLogin()
        }
    }
Including the Config File
Lastly, we need to include the awsconfiguration.json file we downloaded from AWS. Drag that from your Finder to the app project (e.g., under the MyiOSApp folder).
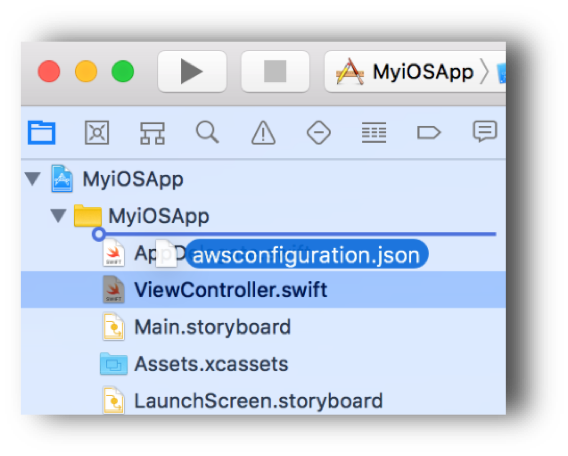
Select to Copy the file and 'Create Groups.' The file should now be stored under your project directory.
If you click on the JSON file in Xcode, you will see the various areas configured for your app like CongnitoUserPool. The AWS CocoaPods will use this to configure your AWS features for the app.
Running the App
If we run the app, the simulator will display the UI. No user is logged in, so the AWS Authentication UI is displayed. From here we can sign in or create a new user:
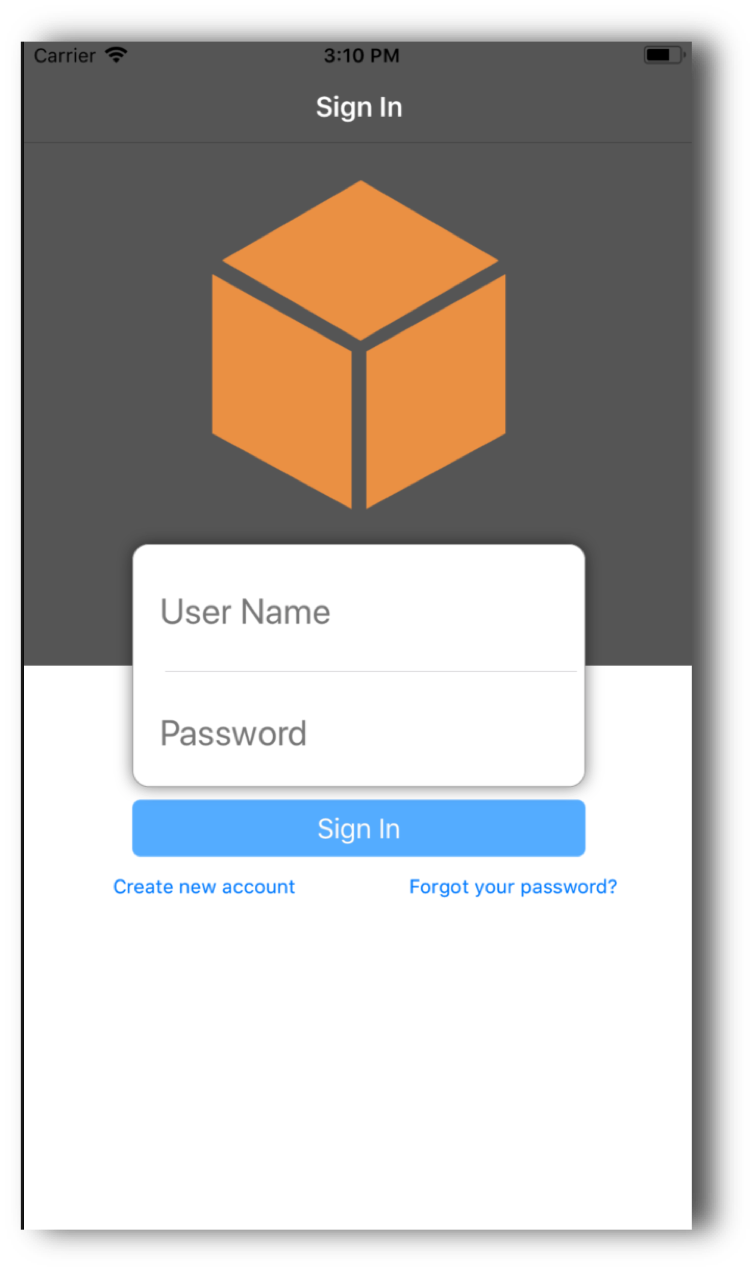
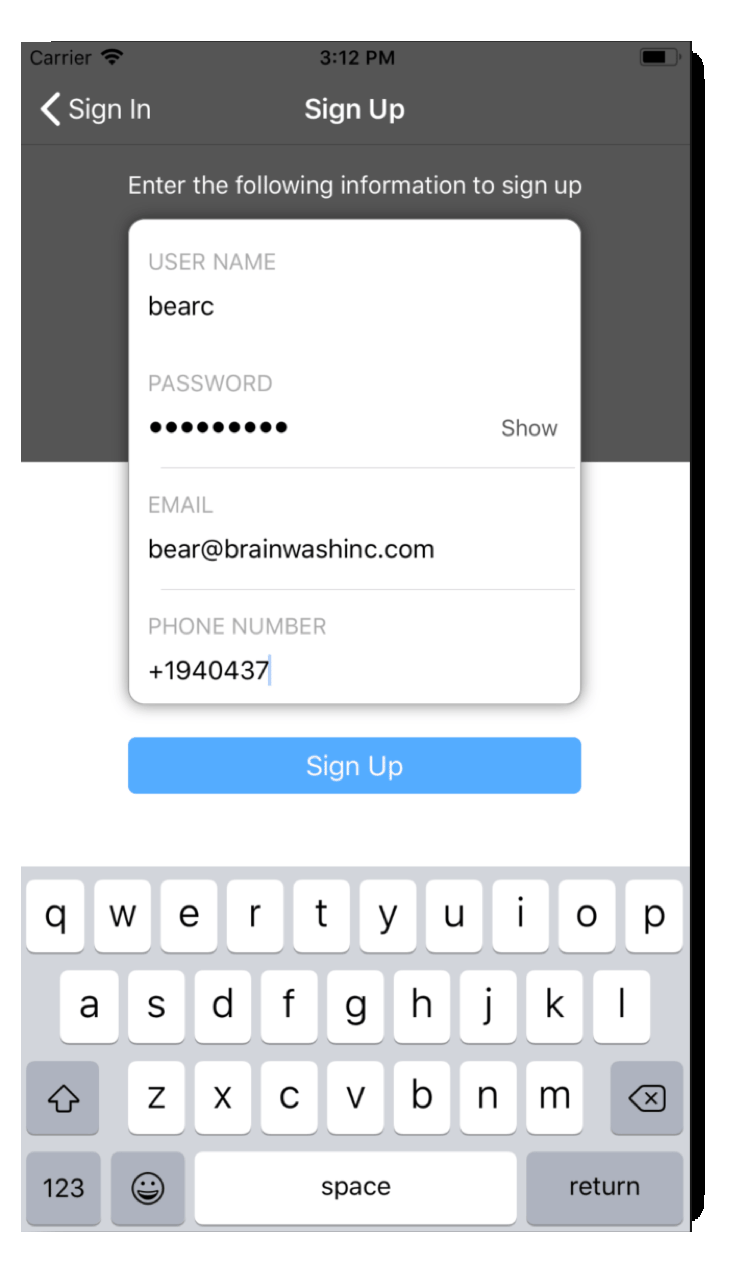
If you click "Create new account," you can specify your account details. Click "Sign Up" and get a confirmation code texted to you. Enter that on the next screen and your account is created.
Confirming Account Creation
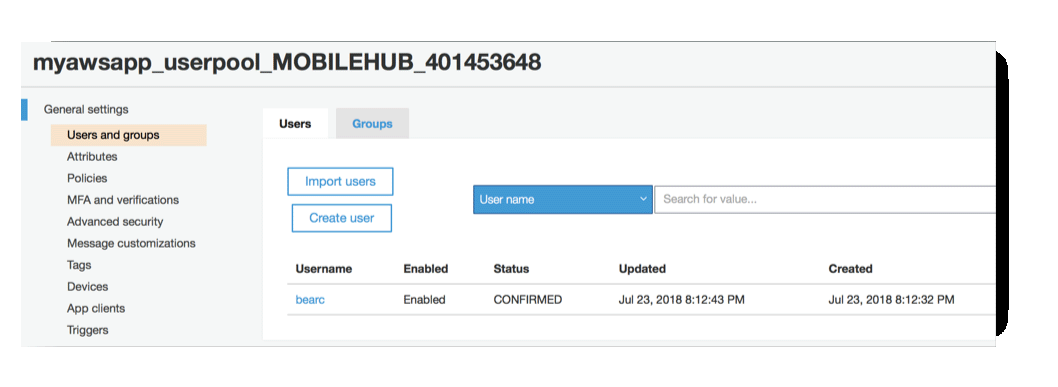
You can view the created account in the User Pool. Go to AWS Cognito, click on "Manage User Pools" and click on the user pool with your app name in it: https://console.aws.amazon.com/cognito/
On the left is all the options to manage the User Pool. Under General Settings, click on "Users and Groups" to see the users:
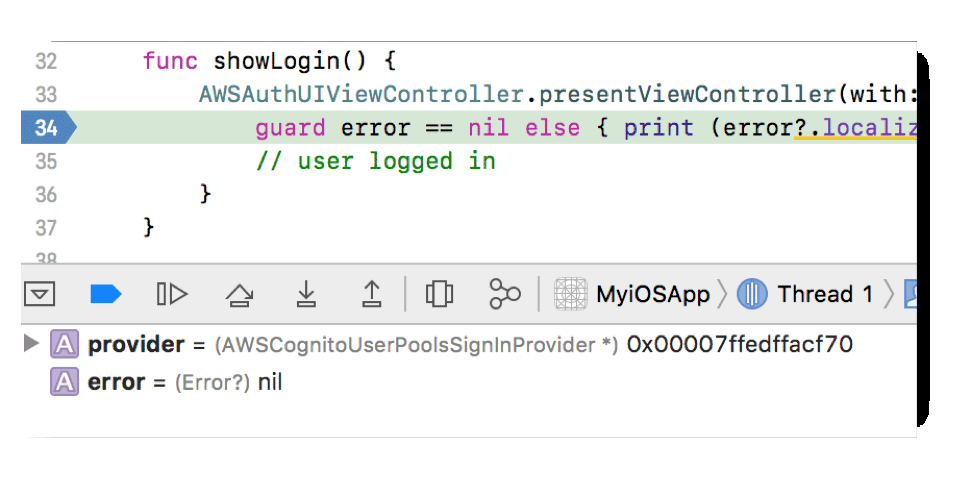
Back in the app on the sign in screen, enter the username and password and sign in. If you put a breakpoint in the code, you can see if an error occurs or not:
NOTE: To log out, you'll need to call AWSSignInManager.sharedInstance().logout, which takes a completion handler closure to be called after the operation. You may want to add a logout button to call this and logout the user.
I encourage you to navigate around in the AWS Mobile Hub, Cognito and AWS IAM:
https://console.aws.amazon.com/mobilehub/
https://console.aws.amazon.com/cognito/
https://console.aws.amazon.com/iam/
Written by one of Accelebrate's mobile development instructors:
 Bear Cahill
brainwashinc.com
@brainofbear

