We offer private, customized training for 3 or more people at your site or online.
In my previous article, I created the Timesheet content type, which contains all of the columns that we will be using in our Timesheet InfoPath form. The InfoPath form requires a SharePoint repository to store each of the entries created in our Timesheet form. In this article, I will show you how to add the Timesheet content type to the Timesheet custom list. The Timesheet content type will be the source of columns for the list.
There are two methods of storing the timesheet data. The first method is to store the information in a standard SharePoint list. This method is the easiest, because the form is linked directly to the list as the data source and requires minimal work to save the form data. The second method uses a SharePoint form library to store the XML data file for each form. The XML file is stored as a document in the library, but requires additional steps to promote the form data values into columns in the form library. There are pros and cons to each approach.
In this example, I am going to use a SharePoint list to store the Timesheet form data in and use the Timesheet content type as our column source.
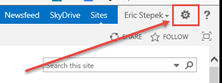
- Begin by clicking the Setting gear icon in the upper right hand corner to open the Settings menu.
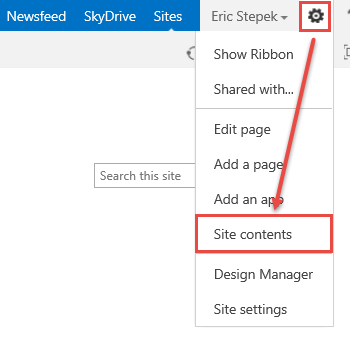
- In the menu, choose Site Contents. This will take you to the page that contains all of your apps (List and Libraries).
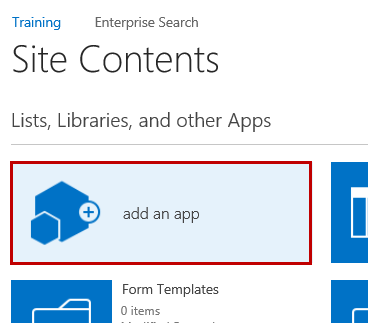
- On the Site Contents page, click the Add an App icon to create a new list app.
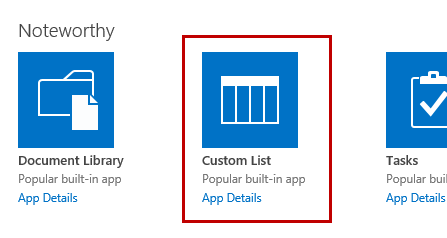
- On the Site Content for Your Apps page, click Custom List, which should be listed in the Noteworthy group.
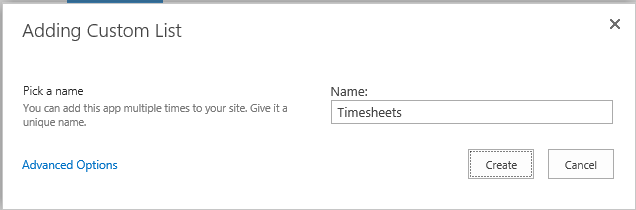
- On the Adding Custom List dialog, click Timesheets in the Name: box and click Create.
- On the Site Contents page, click the new Timesheets app you just created.

- Now it is time to add the Timesheets content type to our new Timesheets list. By adding a Content Type of a list (or library), the content type becomes the source of our columns in the list. If the Timesheets Content Type is updated with new columns, this list will automatically receive the new columns as well.
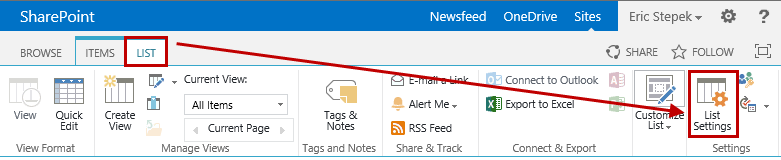
Before you can add additional content types to a list, you must configure the list to allow management of content types. To do this, click the List tab in the ribbon, then choose List Settings.
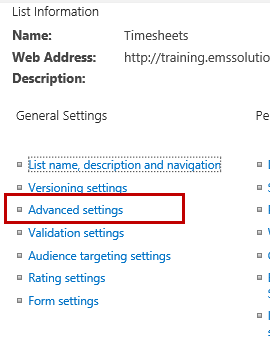
- On the List Settings page, click the Advanced Settings link under the General Settings heading.
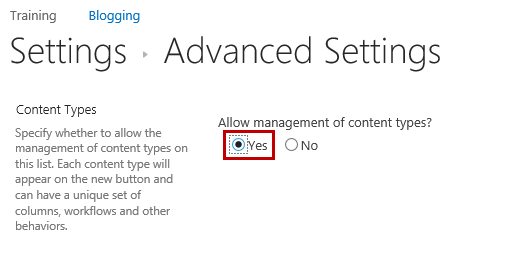
- The Advanced Settings page is where a number of custom configuration changes for the list can be made. For the Allow management of content types? option, select Yes.
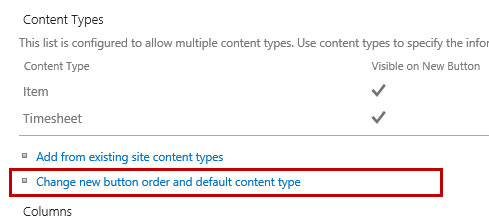
- Scroll to the bottom of the Advanced Settings page and click OK to save the changes. Back on the TimesheetsSettings page, you will see a new Content Types section appear. Notice there is already one (1) content type listed, which is Item.
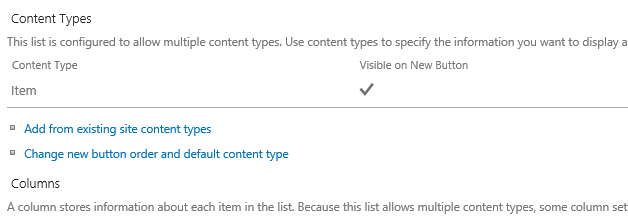
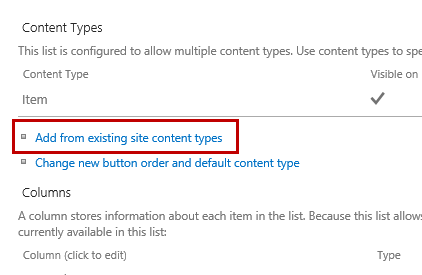
- To add our Timesheet content type, click the Add from existing site content types link (directly below the Item content type).
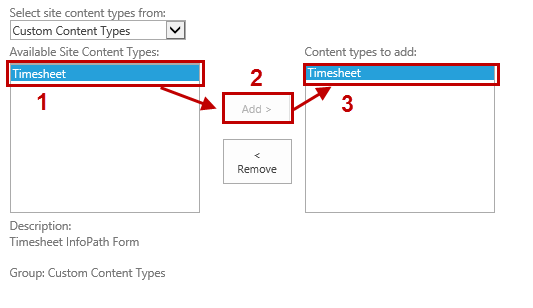
- On the Settings Add Content Types page, select Custom Content Types from the Select site content types from: dropdown. The Timesheet content type will appear in the Available Site Content Types list.
Make sure the Timesheet content type is selected in the Available Site Content Types From: list and click the Add> button. This action will move the Timesheet content type from the Available… list to the Content Types to Add: list. Click OK to save the change.
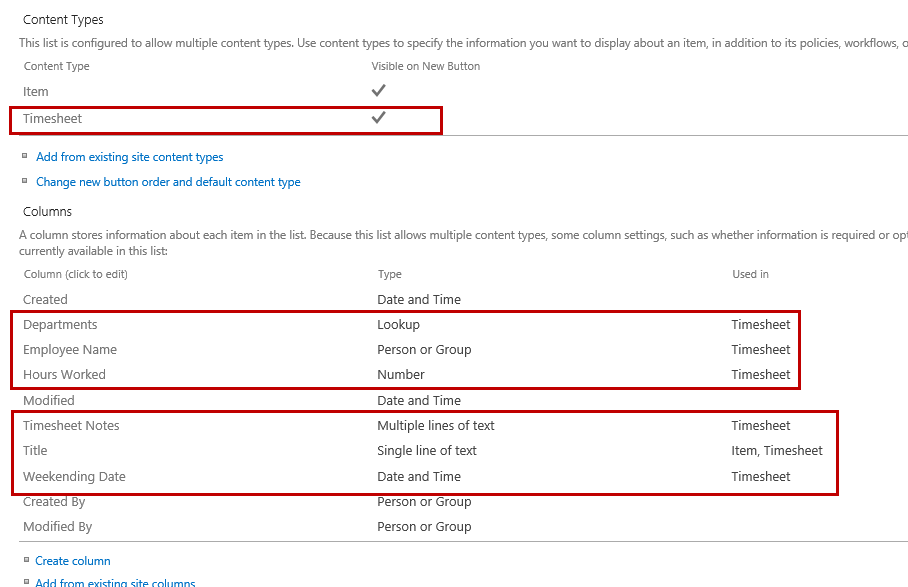
- The Timesheet content type is listed in the Content Types list along with Item and the columns you created in the content type are shown in the Columns list directly below.
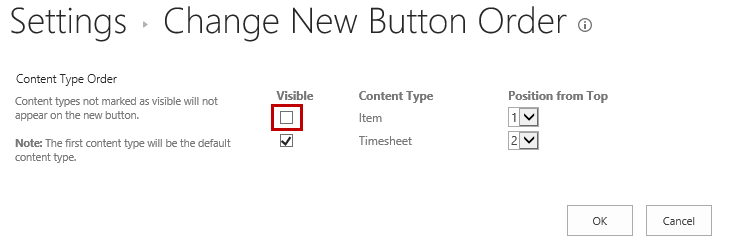
- Since this list is only going to contain Timesheet entries, we want to configure the list so that Timesheet is the default and visible content type. To accomplish this, click the Change new button order and default content type link in the Content Types section, which is shown below:
- With two content types, it is an easy change. On the Settings Change New Button Order page, simply uncheck the Visible checkbox for the Item content type and click OK.
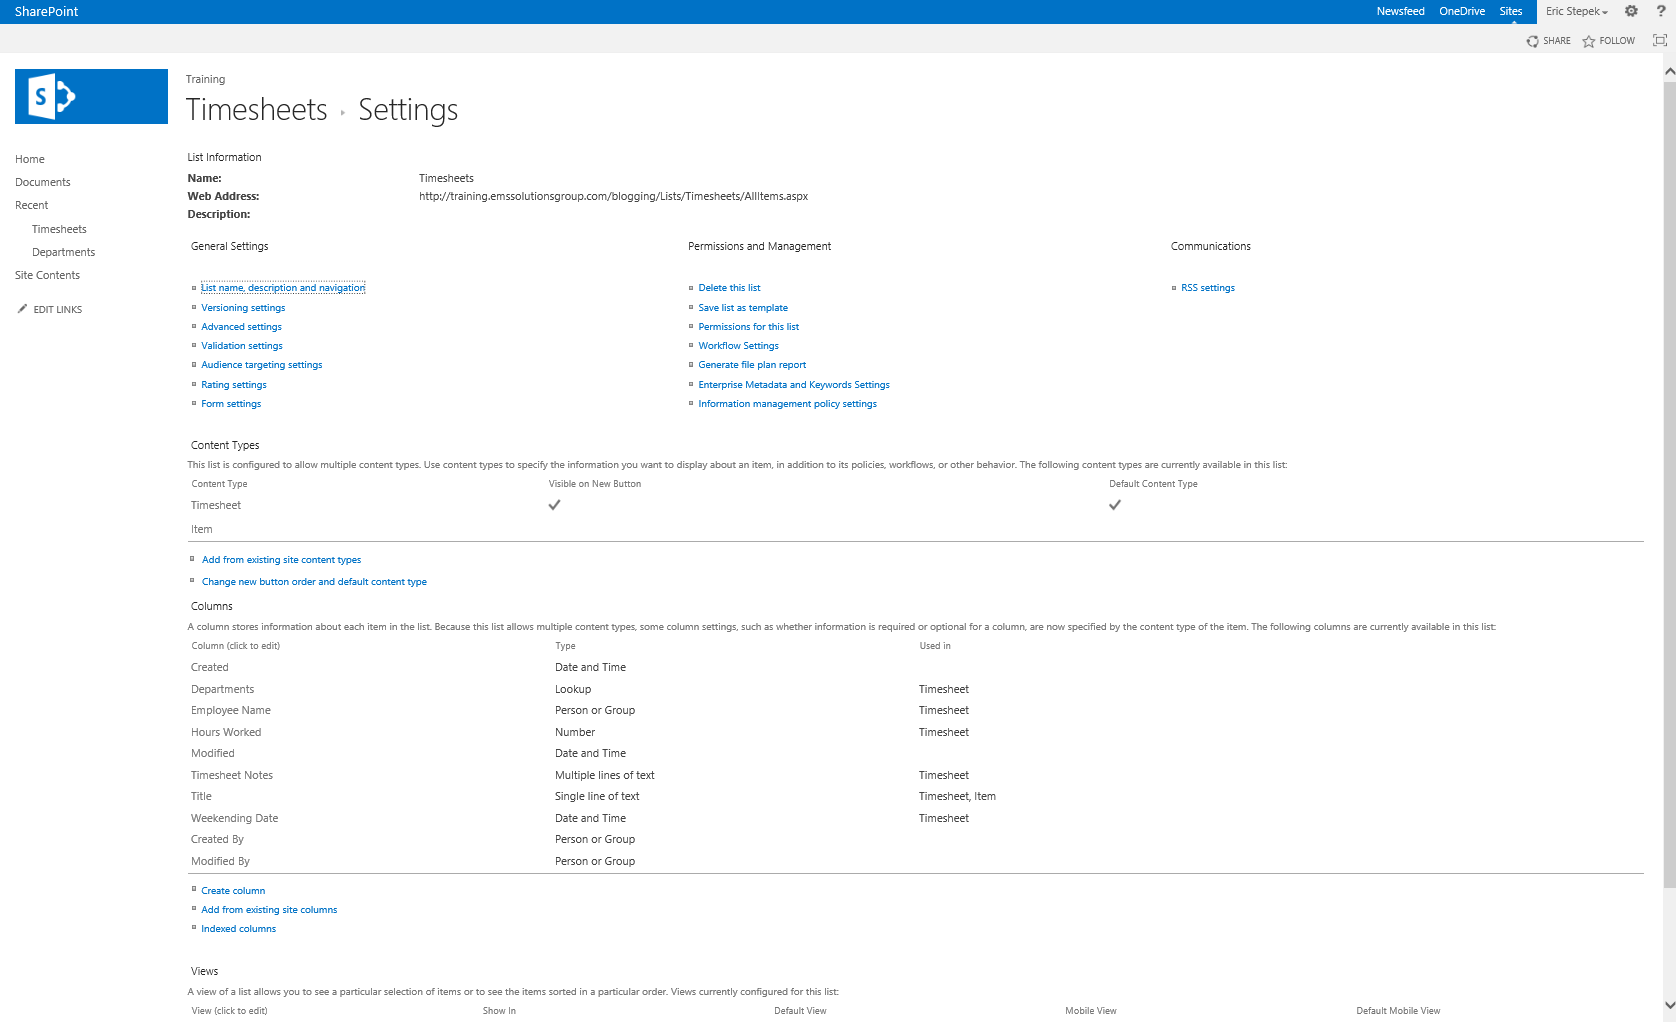
- You should now have a Timesheet list that uses the Timesheet content type as its source of columns and looks similar to the screenshot below:
In the next article, I will walk you through how to create and publish the Timesheet InfoPath form.
Until next time, Happy SharePointing!
Author: Eric Stepek, one of Accelebrate’s SharePoint instructors
Next: Creating the Employee Timesheet Form in SharePoint
Previous: Creating a Content Type for the Timesheet InfoPath Form
In-Depth SharePoint Training
For in-depth SharePoint training, click here to view all of Accelebrate's SharePoint training courses for you and your staff.
Request Pricing
|

